If you’re looking for a way to record or stream your FL Studio sessions, Open Broadcaster Software (OBS) is a great free-to-use application that has all the capabilities to achieve this!
The initial configuration can be a little confusing if you’ve never worked with OBS before, so to help you out I wrote a quick and easy guide that shows you how to setup OBS with FL Studio in Windows 10.
This does not cover the video capture setup as this should be configured by default when you install OBS.
If you want to know how to stream your video/audio feed to Twitch, this is covered in the How to stream FL Studio to Twitch section at the end of the guide.
How To Setup OBS With FL Studio – Windows 10 Guide
Step 1 – Open Audio Settings
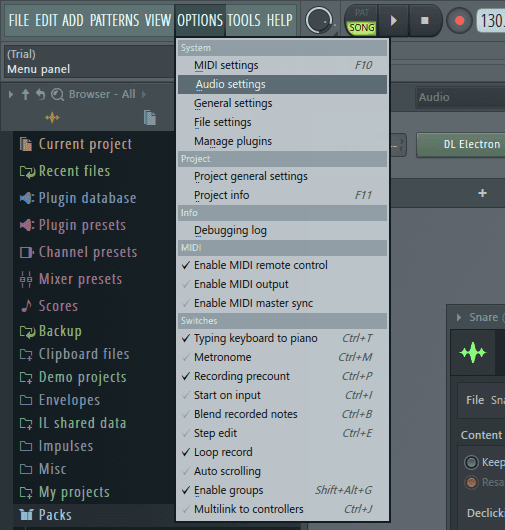
In FL Studio Go to Options > Audio Settings.
Step 2 – Enable FL Studio ASIO Driver
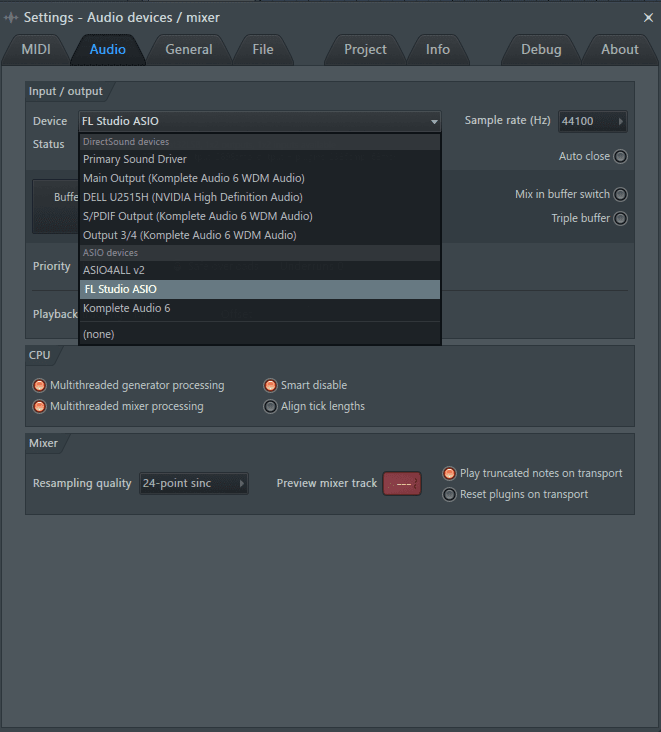
Under the Audio tab go to Device and Select FL Studio ASIO Driver. If you are on an older version of FL Studio you might need to download and install the driver. You can download the driver here.
Step 3 – Download and Install OBS
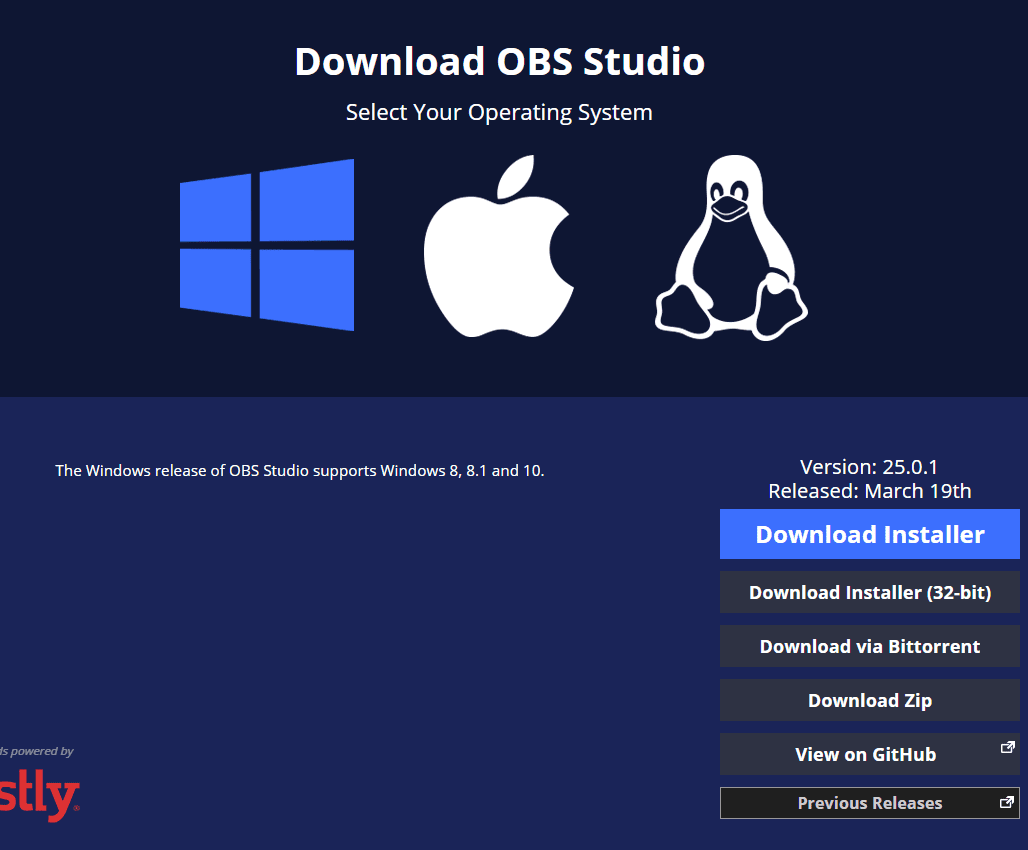
You can download OBS from the OBS website. Run the installer and leave all the options as default.
Step 4 – Open OBS and Configure Desktop Audio Capture
Under Audio Mixer go to Desktop Audio and click on the Gear Icon. Then click on Properties.
Step 5 – Select Main Audio Output

Click the drop down arrow next to Device and select your Main Output. Mine says (Komplete Audio 6) which is the name of my audio interface. You should see the name of your interface next to Main Output. Click OK.
Step 6 – Test Audio

Open FL Studio and play some audio. While it is playing you can alt + tab to OBS and check if the Desktop Audio volume meter is responding to the audio playback. If it does, the configuration is now complete and you can record or stream your production sessions.
How to stream FL Studio to Twitch
- Go to the Twitch website.
- Log in to your account.
- Go to the menu, click Dashboard > Settings.
- Select the Stream Key.
- Click Show Key.
- Copy your stream key by highlighting it and hitting ctrl + c.
- In OBS, go to settings
- On the left Settings menu, select Streaming.
- From the drop down menu next to Service, select Twitch.
- Choose a server close to your location for the lowest possible latency.
- In the Stream Key field, paste your Twitch Key that you copied in step 4 by hitting ctrl + v.
And that’s it! You should be able to start your stream by clicking “Start Streaming” in OBS Studio.
Frequently Asked Questions
I am recording my mic but it is only playing the left or right channel, how do make it centered?
Under the Audio Mixer click on the gear icon next to your mic.
Click on Advanced Audio Properties.
Make sure the Mono checkbox is checked and that the L/R slider is centered.
Why is FL Studio crackling?
Pops and crackles can usually be fixed by adjusting the buffer length on your audio driver. If you are using FL Studio ASIO then you can adjust this by going to Options > Audio settings > Click on Buffer Length, select a higher buffer length, usually 512 or 1024 is enough but you may need to go higher. Keep in mind higher buffer lengths can increase latency, making MIDI keyboards and other instruments difficult to play and record live.
What is ASIO?
ASIO stands for Audio Stream Input/Output. It is an audio driver that was designed to have a very low latency, making live audio recording and tracking in Windows a possibility. With regular Microsoft Direct Sound drivers there is usually a higher latency, which causes a delay between the time an instrument is triggered and the time you hear it through the speakers or headphones. You can download ASIO4ALL from the official website.
How do I record my videos to mp4 format?
By default OBS will record your videos to .mkv format. You can change this by going to Settings > Recording > Recording Format and changing it to mp4.